
Five Easy Ways to Get Started on a Native Plant Garden
- 2 hours ago
- 11 min read
The best time to start is now!

Do you want to get on board with the native plants trend or maybe you are intrigued as to how you can make your garden space more of a contributor to our planet's health, but aren't quite sure where to start? Then this is for you! Whether you have an apartment balcony or a fully established garden, there are easy ways to get started with native plants. All you need to know is right here.
The plants recommended are versatile in terms of light, soil and moisture requirements. They are commonly available at native plant nurseries and garden centers. Native plant nurseries are always the best choice! Read more about shopping for native plants here. Best of all, each plant has multiple seasons of interest. Often, flowers in spring, berries or interesting foliage in summer and great fall color. These are the easiest plants to start with to add excitement to your garden. Read on for a step by step how to guide for each of these five ideas!
One: Plant a Native Tree
It really can be as simple as planting a single tree. Native trees host many, many insects, the dietary buffet our birds quest after to raise newborn birds. Add one tree and feed nests of hatchlings!
Getting Started: Select One of Three Adaptable Small Native Trees


Dogwood
Dogwood trees (Benthamidia florida) are small understory trees that herald the middle of spring across the Chesapeake watershed. White flowers in spring, berries that are technically drupes, in late summer and early fall, brilliant fall color and graceful arching branches make this an easy choice!
These are best for part sun, part shade or full shade locations. Grows up to 25' high and wide.
Fringe tree
Fringe trees (Chionanthus virginica) are small trees blooming in late spring or early summer. Scented large unusually shaped white flowers, fruits resembling navy colored olives and yellow fall color make for a stand out tree. These are best for full sun, part sun or part shade locations. Grows up to 20' high and wide.
Redbud
Redbud trees (Cercis canadensis) are small understory trees that signal spring across the Chesapeake watershed. Fuschia flowers emerge directly from the branches. Heart shaped leaves in summer and a range of fall color complete the redbud array. These are best for full sun, part shade or full shade locations. Grows up to 30' high and 35' wide.
Find a Location for Your New Native Tree
Select a place where you will enjoy your tree every day. Maybe there is a window you like to look out? Might you plant your new tree within that view? Maybe there is a path or door you use most days? That can be a good place for your tree.
Make sure to measure how far your tree is from your house or any other building. Determine the full width of your tree once mature, and then plant it at least half that distance from the building. A redbud tree can grow up to 35' wide so you will want to plant it at least 17' from any building.
Last, make sure you are not planting your tree within the root zone of another mature tree. This could damage the existing tree and will make it harder to plant your new tree and harder for the new tree to establish well.
Buy Your Tree
For a variety of reasons, a native plant nursery, whether you visit in person or order on-line, is the best place to get your tree. If you live in a location with deer pressure, you will need a deer cage. You can make one yourself or purchase one.
If you can't plant your tree right away, place it in a sheltered location where you will see it every day because you will need to water it every other day until you plant it.
Plant Your Tree
Dig a hole the depth of the container your tree is in and twice as wide.
Moisten the hole with water so that the roots of your new tree will have water right away.
Do not add compost, fertilizer or any other amendments. You want your tree to adapt and establish to the conditions of your garden.
If your tree was hard to get out of its pot and you can see lots of roots circling around, rough up the roots on the bottom with your hand or a trowel to encourage the roots to reach out the soil in your planting hole.
Once you have placed your tree so that the top of the root ball of your tree is even with the ground where you are planting, you can backfill the hole with the soil you dug out. Once you have backfilled, lightly tamp the soil around the edges of your hole with your foot.
Water the tree deeply. You want to the tree to have moisture as you get started and the water will eliminate any air pockets that may be in the planting hole.


Tips:
the smaller the tree you choose, the easier the planting and the more likely the tree establishes well.
April, September and October are the best months for planting in the mid-Atlantic.
during the growing season, water weekly with a two gallon bucket of water.
in winter, water monthly when the ground is not frozen.
Two: Add a Native Shrub Layer
If you already have a mature garden, layering in a few native shrubs is a great way to go. Shrubs do not require much maintenance once established and give you a lot of ecological value and multiple seasons of interest.
Getting Started: Select From Three Adaptable Native Shrubs


Carolina allspice
Carolina allspice (Calycanthus floridus) is a large shrub with waxy green foliage and the most exquisite maroon flowers in spring. Good fall color and unusual brown seed pods add to its allure. It is also very easy to grow and versatile in terms of location. These are best for full sun, part sun or shade locations. Grows up to 8' high and wide.
Oakleaf hydrangea
Oakleaf Hydrangea (Hydrangea quercifolia), native the southeastern United States is a superstar of versatility and interest. Papery bark in winter, silver unfurling tinted leaves in spring, large white flowers in summer and and a spectacular range of fall color from orange to red to maroon make this shrub a go to. It will fare well in full sun to full shade once established. These are best for full sun, part sun or shade locations. Grows up to 6' high and wide.
Summersweet
Summersweet (Clethra alnifolia), is a sweet smelling, summer blooming shrub. Fairly long lasting blooms turn to brown seedheads that persist through winter. Fall brings yellow foliage. Dwarf forms of the shrub are also available. These are best for full sun, part sun or part shade locations. Grows up to 8' high and 5' wide.

Find a Location for Your New Native Shrubs
Find a place where you will see your shrubs. Do you have an evergreen hedge? Perhaps you can add your shrubs in front of it. A dark green backdrop will enable flowers and berries to really stand out. Do you have a view you would like to screen? Planting a mix of shrubs can obscure things you'd rather not see. Is wildlife your main goal? Start a mixed hedge of a variety of native shrubs and let them mix and mingle into a hedgerow.
Make sure to give the shrubs space to reach their full width.
Last, make sure you are not planting your shrubs in the root zone of a mature tree. This could damage the existing tree and will make it harder to plant your new tree and harder for the new tree to establish well.
Buy Your Shrubs
For many reasons, a native plant nursery, whether you visit in person or order on-line, is the best place to get your shrubs. If you live in a location with deer pressure, you will need deer cages. You can make one yourself with chicken wire or purchase one. If you can't plant your shrubs right away, place them in a sheltered location where you will see them every day because you will need to water them every other day until you plant.
Plant Your Shrubs
Dig a hole the depth of the container your shrub is in and twice as wide. Moisten the hole with water so that the roots of your new shrubs will have water right away.
Do not add compost, fertilizer or any other amendments. You want your tree to adapt and establish to the conditions of your garden.
Once you have placed your shrub so that the top of the root ball of your tree is even with the ground where you are planting, you can backfill the hole with the soil you dug out. Once you have backfilled, lightly tamp the soil around the edges of your hole with your foot.
Water your shrubs deeply. You want to the plants to have moisture as they get started and the water will eliminate any air pockets that may be in the planting hole.


Tips:
The smaller the shrubs you choose, the easier the planting and the more likely they establish well.
April, September and October are the best months for planting in the mid-Atlantic.
If your shrub was hard to get out of its pot and you can see lots of roots circling around, rough up the roots on the bottom to encourage roots to grow out of the soil in your planting hole.
Water weekly with a two gallon bucket of water. In winter, water monthly when the ground is not frozen.
Three: Convert Some of Your Lawn into a Garden Bed for Native Plants


You can start with as small or large an area as you like. No worries about the work required to dig up turf. With this easy cardboard method, you will do no turf removal at all and when it is time to plant, the soil will be soft and easy to dig!
Getting Started: Decide Where to Convert Lawn to Garden Bed
Is there a view you want to enhance? Is there something you'd rather not see? Do you fancy sitting next to some flowers? Choose a location you can enjoy. If you plan to plant trees or shrubs in your new garden bed, you will want to follow the guidelines above for choosing a location. If you want to plant perennial flowers, you have more flexibility. There are perennial flowers for shade and sun.
Steps:
Collect cardboard - enough to cover your new planting bed with a single layer. I've gotten cardboard from neighbors, grocery stores -- our world has a lot of cardboard right now!
You will also need land staples and enough mulch or compost to cover your bed with a 4" layer.
Remove the tape from the cardboard and cut any boxes so you can lay the cardboard out flat. Place the cardboard on the area of lawn you want to eliminate. Use your staples to secure the cardboard to the ground. You need about one staple per 5 square feet. Once your cardboard is stapled to the ground, give the cardboard a nice soak with the hose. Add your mulch and forget about it until next fall. Your grass will likely be gone long before that, but fall and spring are the best time to plant. Your new area likely won't be ready this spring.
Peeking:
If you are curious as to what's happening under there, it's fine to peek! You will be amazed at how quickly the grass begins to decompose.
Planting:
By the time fall rolls around, you will have some very nice soil for planting. Select a tree, shrubs or flowers recommended in the other sections, or all three, and voila, your lawn will have a new garden bed. Choose a tree, shrubs, flowers or all three!
Tips:
It's tempting to leave the tape on boxes you might be using. The box will decompose but the tape does not. You end up having to fish out the tape from your garden bed. Speaking from experience...
When placing staples, make sure to get the edges of the cardboard near the outer part of the new bed. You want to make sure the cardboard is stapled down where wind might get underneath and lift the cardboard.
The edges around the mulched cardboard can be a bit unclear. If you prefer a crisper look, after a soaking rain, use a spade to edge around the cardboard creating a clean demarcation between the new bed and the existing lawn.
Four: Create a Native Plant Container


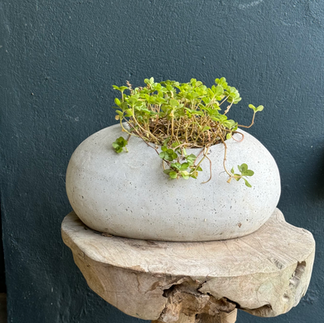


Containers are a fun and easy way to start. And you will be truly amazed at how adept pollinators are at finding flowers many stories above the ground.
Getting Started: Select a Container:
The larger your container, the less frequently it will need to be watered.
The most sustainable choice is the container you already have or a thrifted container.
If you intend to keep your container out year round, look for a frost proof container (some ceramic pottery, fiberglass or metal but typically not terra cotta)
Think about whether you want to place the container on a rolling plant caddy in case you will need to move it. A watered container can be quite heavy.
If the container does not have drainage holes, you can add them with an electric drill. There are lots of tutorials on-line to show you how.
Selecting Potting Soil:
Unless you are experienced at mixing your own soils, it's best for the plants to purchase a soil mix specifically for containers.
An organic mix without added synthetic fertilizers is preferred for native plant containers. Organic Mechanics in Pennsylvania is a good local choice and available at many hardware stores and garden centers.
Planting & Watering:
You can plant a container at any time during the growing season so long as you have a way to water it. If your container will be in a sunny and/or windy location it may need daily or sometimes even twice daily watering during the height of summer. Press your finger into the top of two inches of soil. If it's dry, water is called for.
Determine Whether Your Container is in Sun or Shade and Buy Plants Accordingly
Three Adaptable Plants for Containers in 6+ hours of Sun


For a container in sun, you might start with these three long blooming perennials that have similar water requirements. You should have flowers from June through October!
Aster 'October Skies'
Aster 'October Skies' (Symphiotrichum 'October Skies' is a fall blooming perennial flower with long lasting blooms and the ability to spill over the side of a container. It has average moisture requirements.
Blue Hyssop
Blue hyssop (Agastache foeniculum) is a summer blooming perennial flower with long lasting blooms and an upright growing habit. It has average moisture requirements.
Tickseed
Tickseed (Coreopiss verticillata) is a summer blooming perennial flower with continual blooms and feathery foliage. It has average moisture requirements.
Three Adaptable Plants for Containers for Less Than 6 hours of Sun


For a container in part shade or shade, choose these three long blooming perennials that have similar water requirements for flowers from May through October.
Golden Alexanders
Golden alexanders (Zizia aurea) is a spring blooming perennial flower with long lasting blooms and a fluffy casual growing habit. It can do well with average moisture.
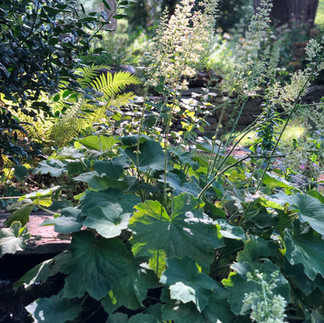
Heuchera ' Autumn Bride'
Heuchera 'Autumn Bride' (Heuchera villosa 'Autumn Bride') is a long blooming perennial flower with blooms from August to October. It has average moisture requirements.
White Wood Aster
White wood aster (Eurybia divaricata) is a billowy fall blooming perennial flower with continual blooms and narrow foliage. It has average moisture requirements.
Tips:
Most sources of information recommend fertilizing plants in containers because once the nutrition in the soil is depleted, the only new inputs are from you. With native plants, this is not as necessary. Many plants including those recommended here do not need or want rich soils. Plans can last years in containers. Wait until you begin to see decline before freshening up the soil.
If you have a large container, it's tempting to use a filler in the bottom to reduce the amount of potting soil you need. It's best not to do this. There is research showing that using fillers interferes with drainage and the plants' growth.
Five: Hire A Professional Native Plant Landscaper

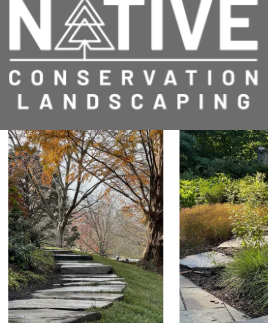
If gardening or DIY projects are not for you, there are many landscapers who specialize in native plant landscapes. Those I am aware of are listed here. You can hire someone to coach you or design the entire garden, plant it and maintain it. Be sure to look for someone with a portfolio that demonstrates they work with native plants routinely.
Getting started with native plants brings joy, learning and a sense of discovery. Perhaps the most magical part of it is how quickly you will notice a difference in your landscape once you start adding native plants. You might see a new bird or butterfly. Then you see another and before you know it, you realize there is so much more to be aware of. It's an enchanting experience and it is ongoing. If you have already started down this path, please consider sharing this post, along with your ideas, with someone else who might want to get started. The more native plants the better!
Happy Gardening.


Comments